Revamping Your Floors: The Art of Sanding Before the Final Coat
Hey there, fellow design enthusiasts! Today, let’s chat about an essential yet often overlooked step in finishing your hardwood floors: sanding before applying that final coat of polyurethane. If you’re embarking on a flooring project, you’ll want to make sure every detail is just right. So grab your tool belt and let’s dive into why sanding is crucial, along with some handy tips for a flawless finish.
Why Sanding is a Game-Changer
Sanding your polyurethaned floors may seem like an extra chore, but trust me, it’s well worth the effort. Here are some of the top benefits:
-
Smooth as Silk: Sanding removes imperfections, ensuring your surface is perfectly smooth. This is particularly important before applying the final coat, as it allows the polyurethane to adhere better and results in a more polished look.
-
Enhanced Adhesion: This step preps the surface for the final coat, allowing it to grip better. If you skip this, you might end up with peeling or bubbling, which nobody wants!
- A Bit of a Scrub: Sanding lightly scuffs up the surface, which helps to lock in the new coat of finish. It’s like giving your floors a little facelift!
Things to Consider Before You Sand
While sanding has its perks, it’s essential to keep in mind some potential drawbacks:
-
Time-Consuming: Yes, sanding can be a bit of a time suck, especially if you’re working on a large space. Be sure to allocate enough time for this task so you don’t feel rushed.
- Dust, Dust, and More Dust: Be prepared for a bit of a mess. Investing in a good dust mask and a vacuum with a HEPA filter will make the cleanup easier and keep your lungs happy.
Practical Tips for the Perfect Finish
Now that you’re on board with the benefits of sanding, let’s discuss some practical tips to ensure you nail this process:
-
Choose the Right Grit: Start with a coarser grit (around 120) and finish with a finer grit (220) for a smooth surface. This two-step process will yield the best results.
-
Employ the Right Technique: Sand with the grain of the wood to avoid scratches. Gentle, even pressure is key!
-
Don’t Rush the Cleaning Process: After sanding, make sure to thoroughly clean the floor. Sweep away the dust, then use a damp cloth to pick up any remaining particles. A spotless surface is crucial for that final coat.
- Test a Small Area First: If you’re unsure about how your floors will react, give a small, inconspicuous area a quick test. This way, you can see how it sands and adheres.
Questions You Might Be Asking
How Long Should I Wait After Putting Down the Initial Coat?
Typically, you’ll want to wait about 24 hours after the initial coat before sanding to ensure it’s fully cured.
Can I Skip Sanding if the Floor Looks Good?
Though it may seem tempting, skipping sanding can lead to uneven finishes and a less durable final product. It’s best to take the extra time for a long-lasting, beautiful finish.
What Tools Do I Need?
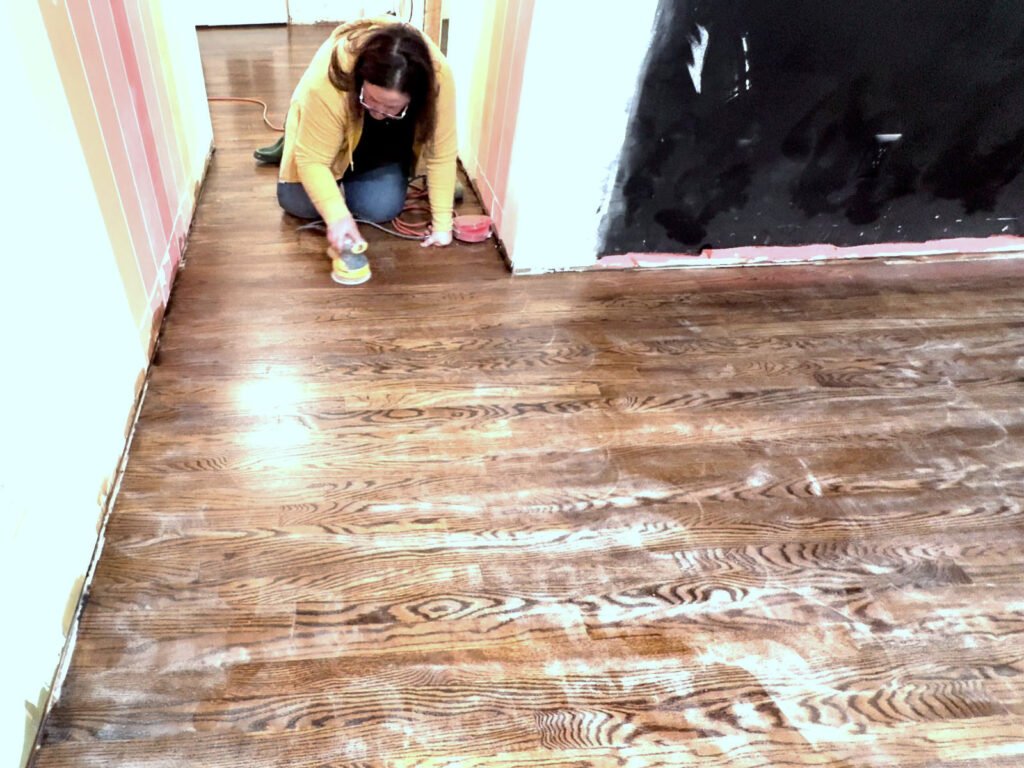
A drum sander can save you time, but a handheld orbital sander works too, especially for tight corners or smaller spaces.
Wrap-Up
Sanding your polyurethaned floors before the final coat might just be the secret to achieving that dreamy, high-end finish you’ve been aiming for. With a little elbow grease and the right approach, you’ll step back and admire your work, proud of the stunning floors you’ve created. So, roll up your sleeves, and let’s get to sanding!
Have any tips or stories from your own flooring projects? Feel free to share in the comments! Happy decorating, everyone!